How to draw Nidorino from Pokemon step by step
How to draw Nidorino from Pokemon step by step with this how-to video and step-by-step drawing instructions. Pokemon drawing is easy for beginners and everyone. 3d drawing easy
Please see the expressed tutorial in the tape low.
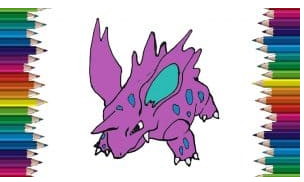
Nidorino is a light purple, quadruped Pokémon. It has a ridge of toxicity on its back and a long sharp horn on its forehead. The horn is more complex than a diamond; please see the drawing tutorial in the video below.d and is capable of secreting poison on impact. Its short legs have three claws on each foot. This is the only species; the female counterpart is Nidorina.
You can refer to the simple step-by-step drawing guide below.
Step 1
I like to start with a guide for the head. A simple, rough circle would be suitable for that. It is not perfect, just enough to get the shape. I do not use the instructions for the body, but most people do, so after completing the drawing, I have made a rough guide to the body’s shape. If you are doing this on paper, remember to draw as lightly as possible, as this will be deleted. If you are doing this on a computer, it may be easier to reduce the opacity to see what you are doing!
Step 2
I usually start with the head. Here, I draw shapes and the nose, mouth, and jaw!
Step 3
Now you can draw in the horns! It will go down a bit. You can also remove the eye and sticky teeth. I also went ahead, and expanded where we left with the head (which would turn it into a back) and started the chest, which the leg would cut off. Nidorino from Pokemon
Step 4
I continued with both ears. Big ears and slightly jagged
Step 5
Now you can draw in the ear opposite you. I also started by painting in the mountains near my head. Nidorino has run along its back, and this is an excellent place to start them since we have finished the first part. You can also draw plates to continue with the legs in the next step. I left some gaps in my line.
Step 7
You can complete your Nidorino by sketching the rest of the ridges along its back and hind legs. Other hind legs are concealed behind the front legs in my drawings, but you are more welcome to create. The hind legs have only two toes.
Step 8
You can now delete the guides and ink in your drawing if you choose.
Step 9
Here, I added color flat and changed the color of the linework. I chose the color using the color picker to copy the color of the spots and make it a bit darker, and that was the color of my lines. On a digital program, you can change the color of your lines by locking your lineart layer (or keeping the opacity, depending on the program) and then coloring only on it. You will only draw content on that layer until you unlock it. It can be helpful for more than that, though! Be creative about the colors you use.
Step 10
Here I added some balls of celebrities! To choose colors, I used a color of Nidorino, but you can make it warmer or cooler, depending on the atmosphere you want, or use a vibrant color! You can create any effect just by the color you use for shading! I added a bit of sunlight to the display of the light source (and I did it in the color I used to cover the shadows.) I put down the color I wanted to have a cloud and then set my layer. You can also adjust the opacity of this layer.)
Step 11
You can keep it shade or blur or soften the edges to make it softer, which I did for this piece. I also added some highlights. The highlights will be placed where the light will hit, but you may not like it too bright, depending on how you want it to look.
Step 12
This is the color wheel in the SAI Paint Tool, where you can select the color you want to use. When choosing colors for shading, it is best to stay away from the edges! Sometimes, black and white work, especially with certain art styles, but it is usually better to use color! We are black and white along the edges of this box, but as you can see in the upper right corner, we have a very pure color! I try not to use that when shading. Inside the box,
Step 13
Now you can choose a background if you want! My experience is not the best; you might find something better! But, I will show you how I did this.